How to live stream your Serato Studio sessions
We want to provide some insight and solutions to help keep your passion alive, to keep creative, entertaining your fans, and sustaining a regular part of your life when everything is starting to feel irregular.
Here is a way you can Live Stream your Serato Studio sessions, for your followers on social media. Serato’s Artist Relations Manager, Matt Perry, will be doing some of his own in the coming days and weeks. This will be an opportunity to learn something, ask questions, and chat.
Here’s what you need to do:
1. Download OBS (and Serato Studio if you haven’t already)
Open Broadcaster Software (OBS) has proven to be a great option to use for live streaming. It’s free, and easy to use.
Download OBS here
Download Serato Studio here
2. Get your hardware together
Using OBS requires an external sound card in order to maximize your control over the various audio signals you’ll be receiving and having to output. In Matt’s case, he’s using:
- DJ Mixer/Controller – DJMS9 mixer
- Audio Interface – TC Electronic Impact Twin audio interface. Although any soundcard you own will do
- Microphone – Shure SM58 Microphone
- MacBook Pro 15”
- Secondary Display/Monitor
There are many different ways to set up OBS with different gear. Hopefully, this will provide you with the steps you need to get going and augment it the way you see fit.
3. A quick insight into how to set it up with Serato Studio
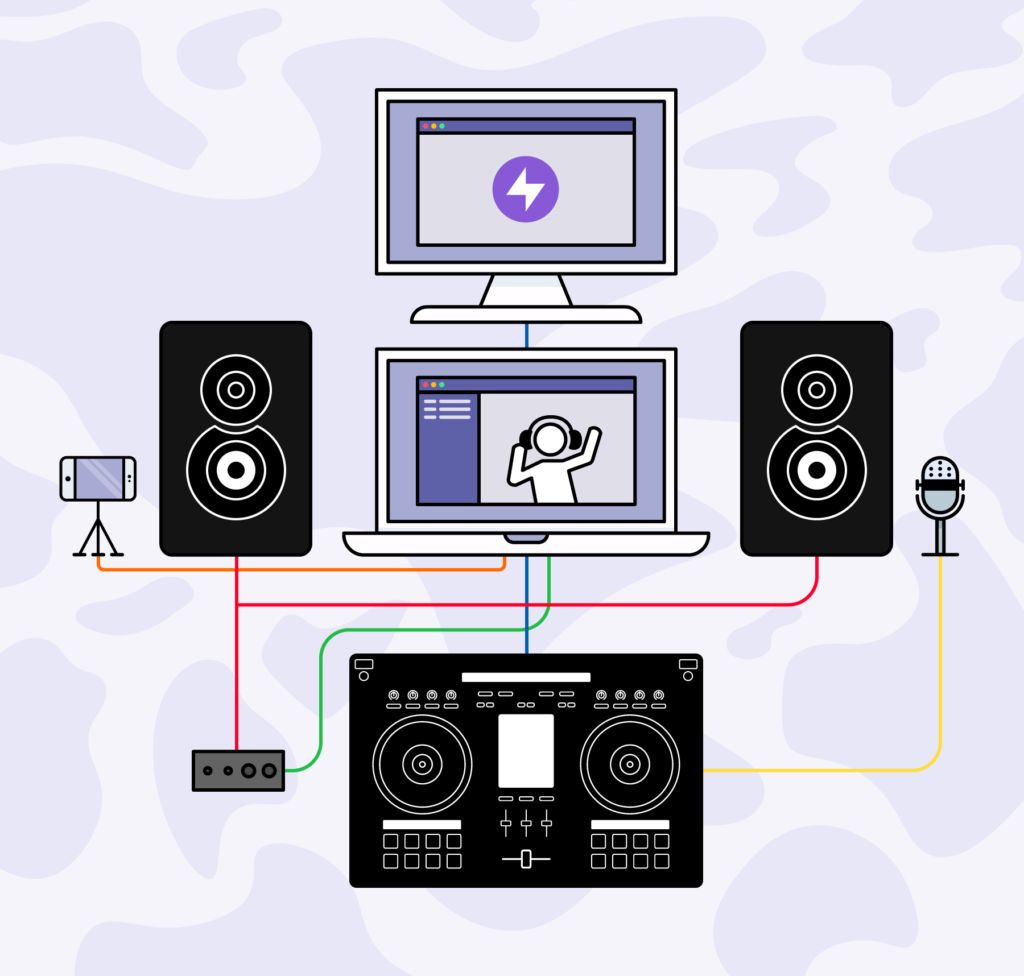
- The DJM-S9 mixer is plugged into the audio interface.
- Both the DJM and Audio interface are connected to the computer he’s using (Macbook Pro).
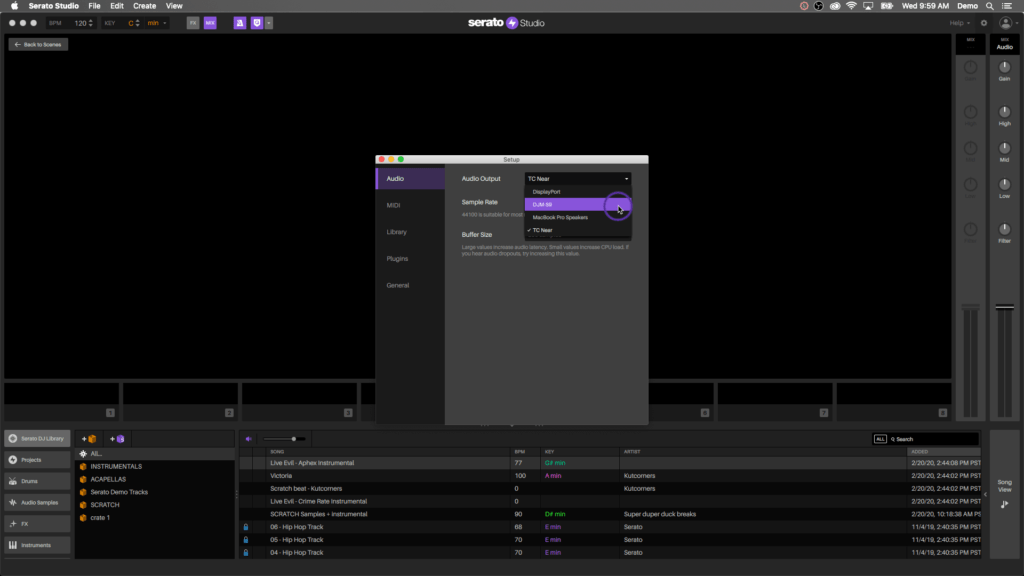
- Serato Studio is set to output to the DJM-S9.
- A secondary display that displays Serato Studio.
Doing it this way means the audio is coming directly into the audio interface, allowing maximum adjustment.
Finally, the mic is plugged into the DJM mixer, allowing control for this level too.
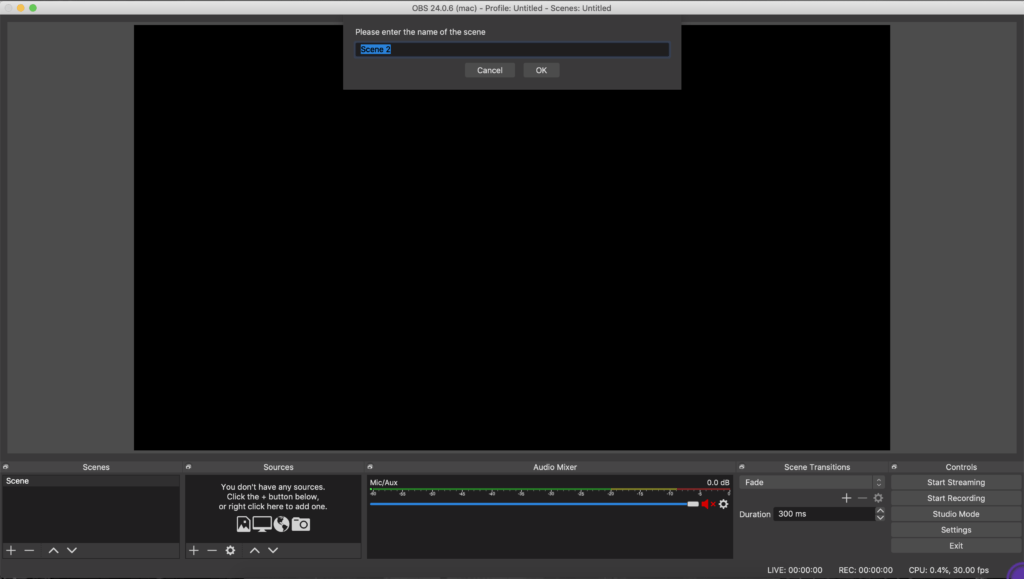
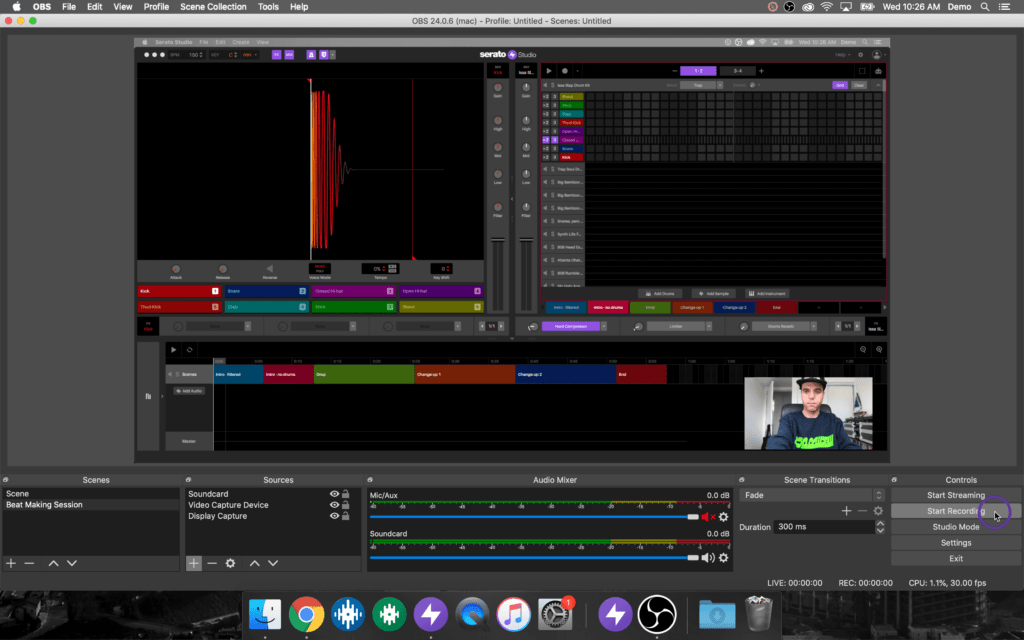
4. Open OBS
Once you’ve done so, you’ll need to create a new ‘Scene’. Click the ‘+’ sign the Scenes area to do so and label it whatever you wish.
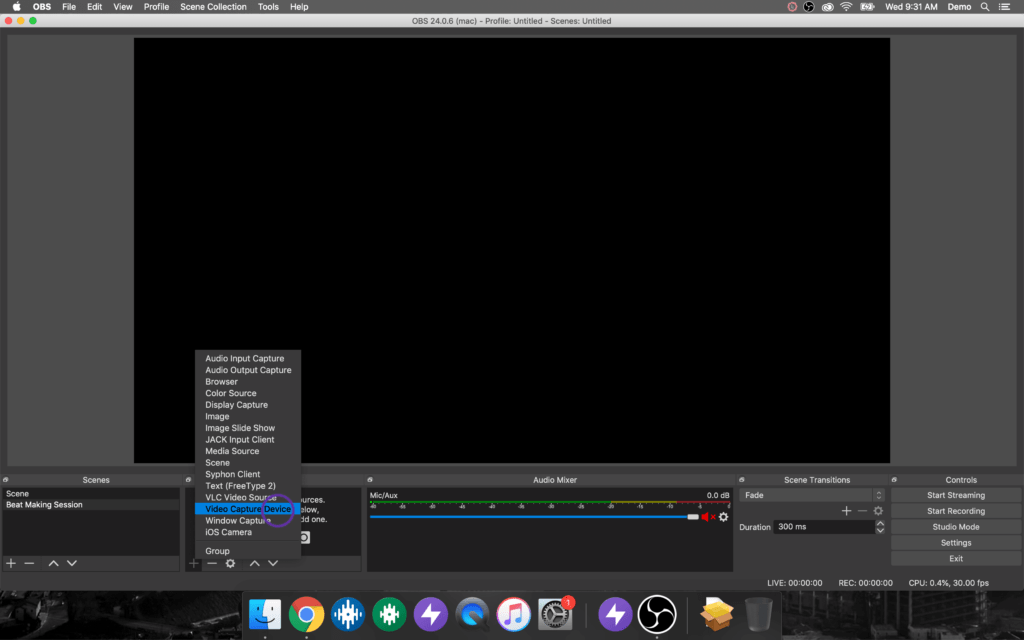
5. Set up your Sources
You’ll need to assign what audio/video input is going where, which can be done in the ‘Sources’ tab down the bottom of the GUI.

Click the ‘+’ sign and choose one of the options from the list.
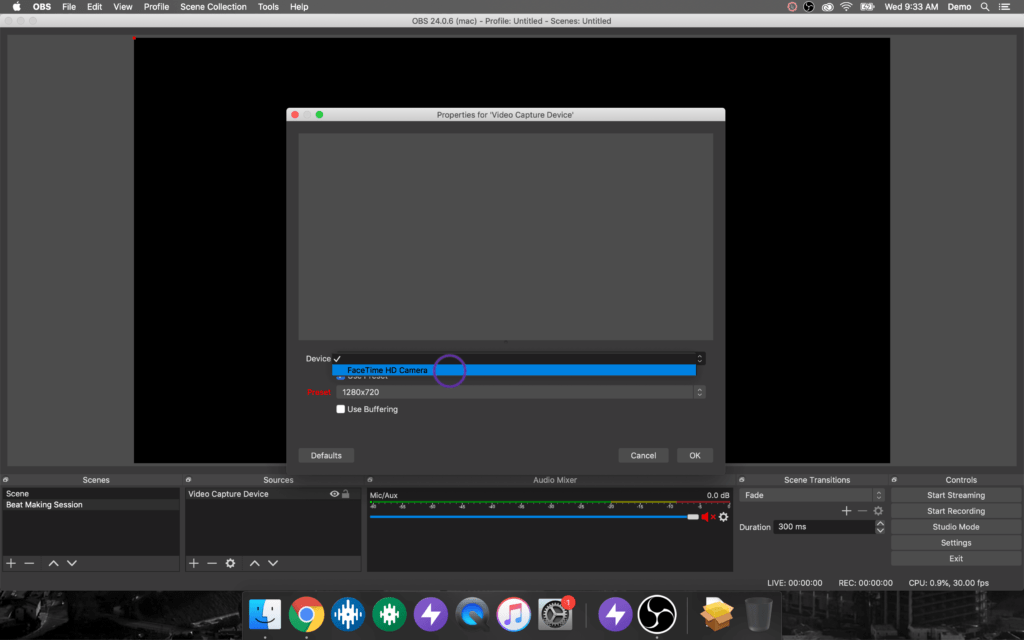
It’d be good to set up your FaceTime camera to start, so choose the Video Capture Device option.
You’ll be prompted to B ‘Create new’ click OK.
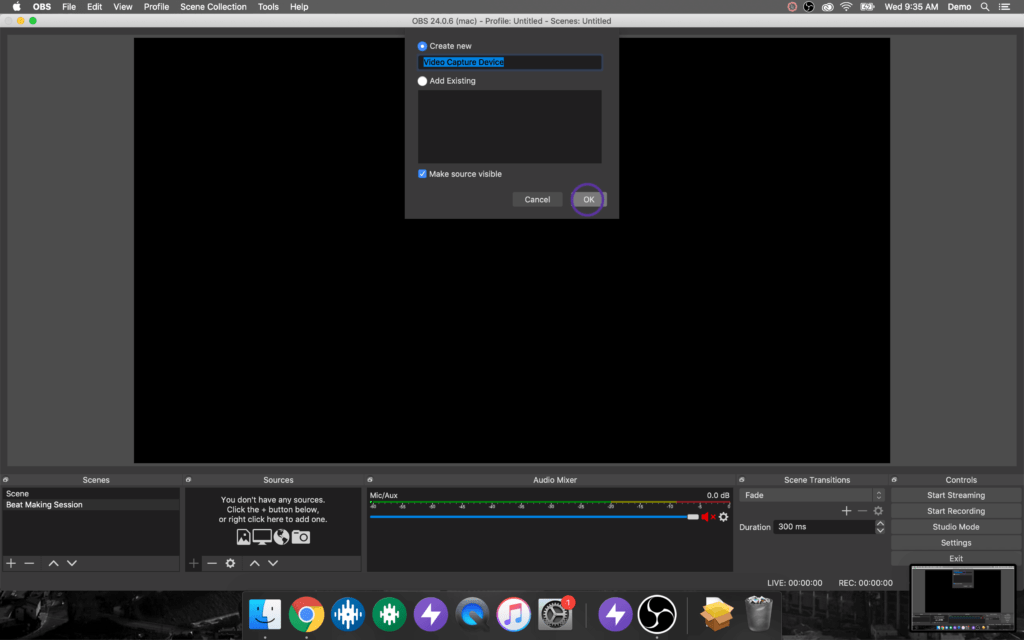
Now choose FaceTime Camera from the Device menu
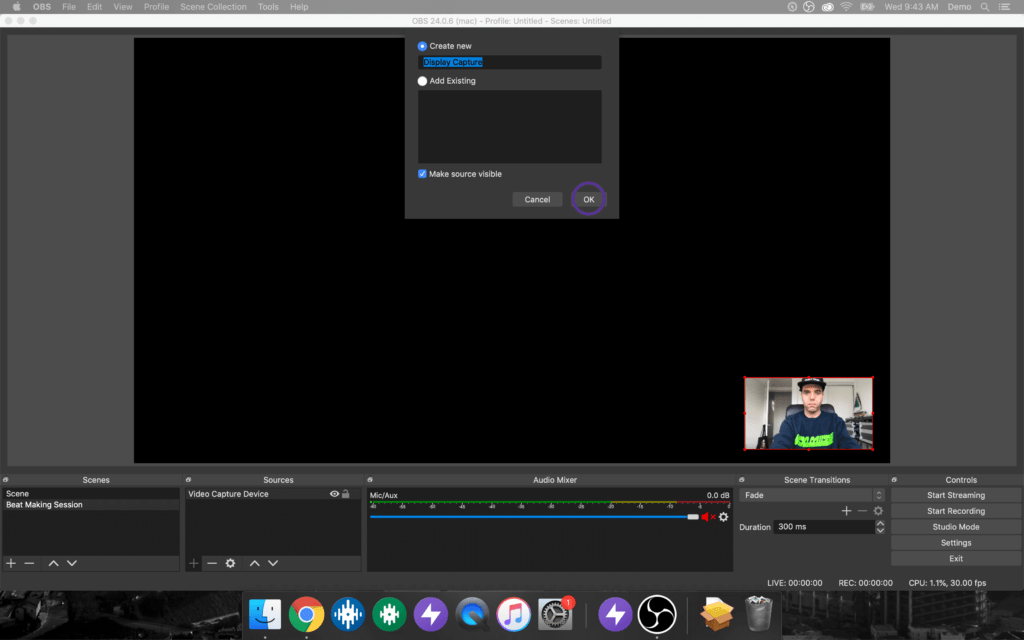
6. Move and Resize your camera display size to your desired spec
You’ll want to change the size of the window that displays your camera. Do this by clicking on the corner of the window otherwise it will warp it. You don’t want that.

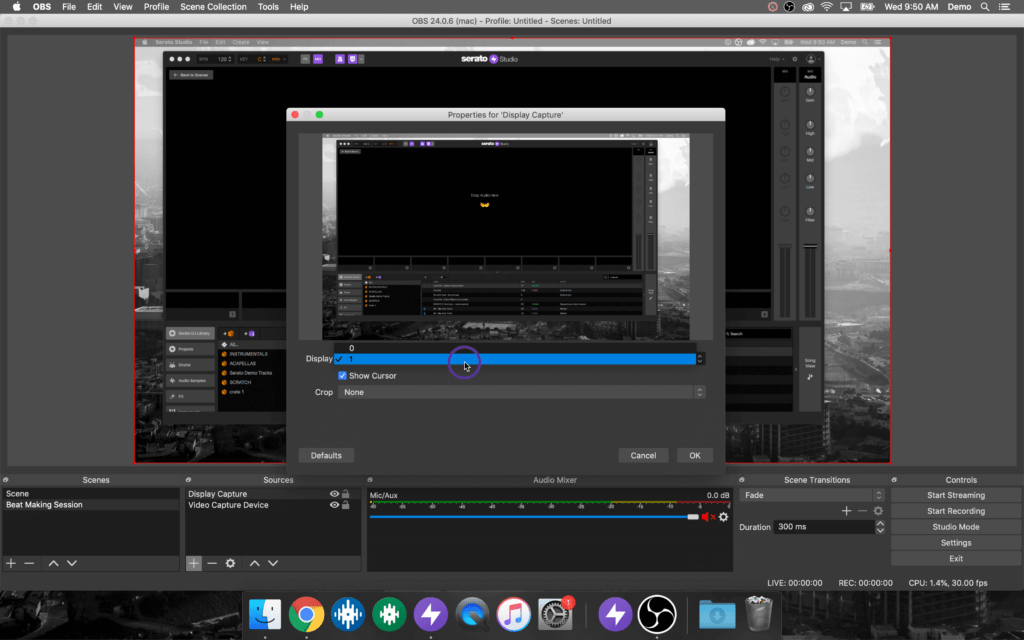
7. Add your secondary display
Click the ‘+’ button in the Source menu and choose display capture.

In the next window, select Display Capture and ‘create new’.
In the device menu, you can choose which display you want to capture.
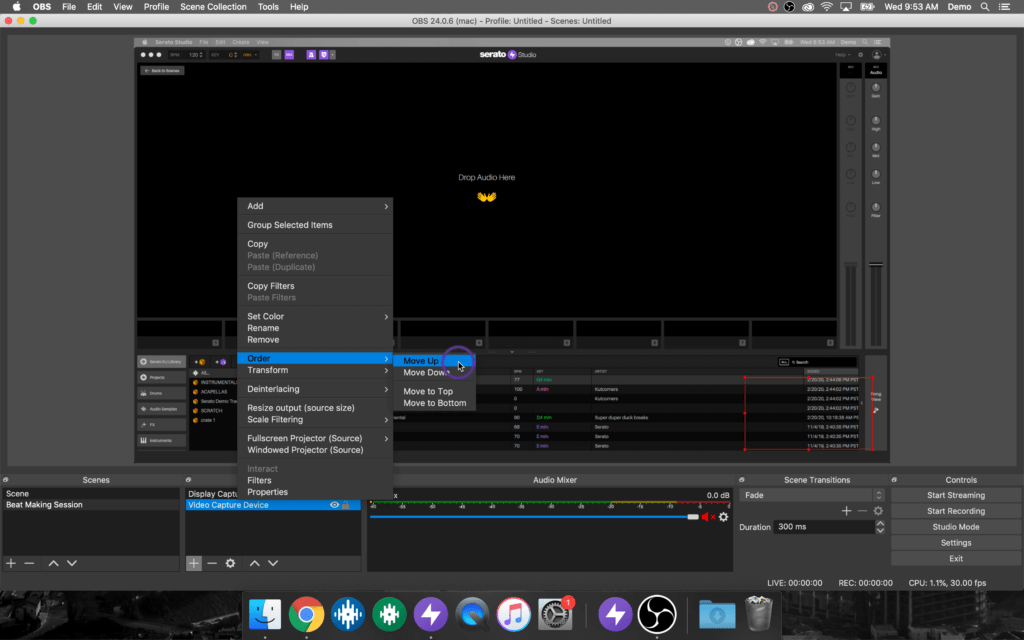
You’ll now need to move the Display Capture to behind the FaceTime capture. Do this by right-clicking the FaceTime camera and select ‘Move Up’ from the ‘Order’ option.
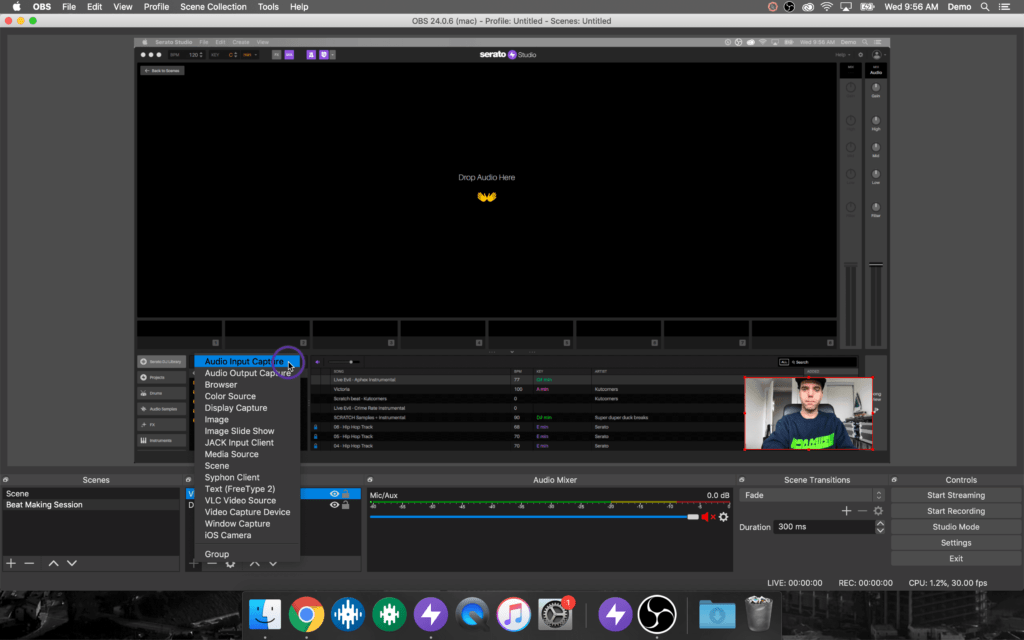
8. Add the audio capture device from the sources menu
Following the steps like before, select the Audio Input Capture to add a soundcard from the menu.
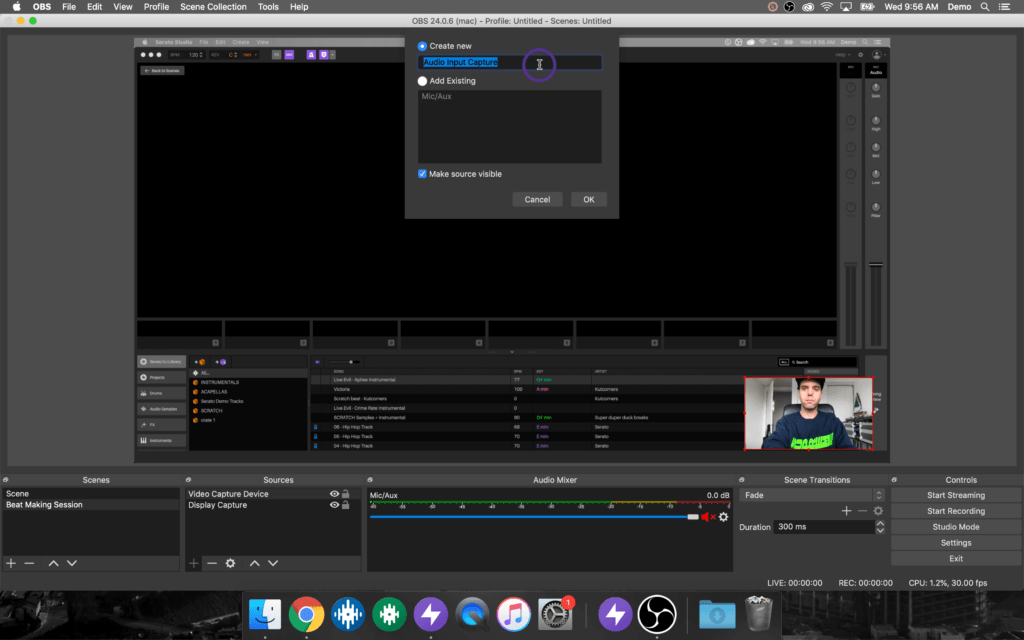
Create a new device and you can name this what you want.
Now choose the soundcard you want to use. (This will be the soundcard you have your DJ Mixer/Controller audio coming in to, not the DJ Mixer/Controller).

Now in Serato Studio make sure you are sending the audio out to the DJ Mixer.
Do a quick line check and make sure your audio is coming in right. (You’ll want to mute the internal mic to avoid feedback if you aren’t using headphones.) See below
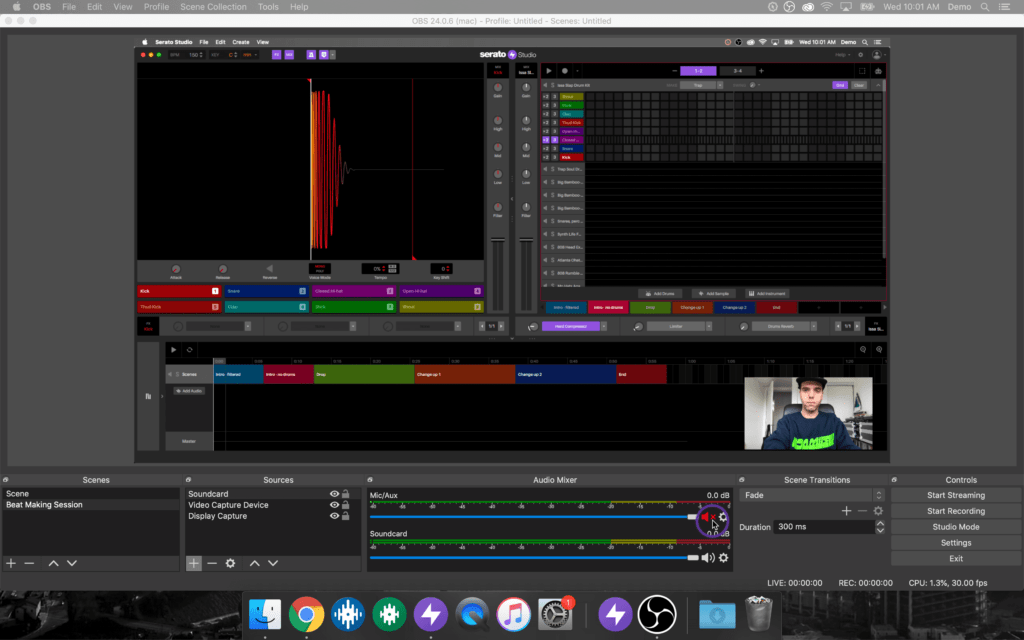
Now you’re all set up in OBS.
Save this profile and label it so you can get going quickly the next time you want to live stream.
Time to broadcast…
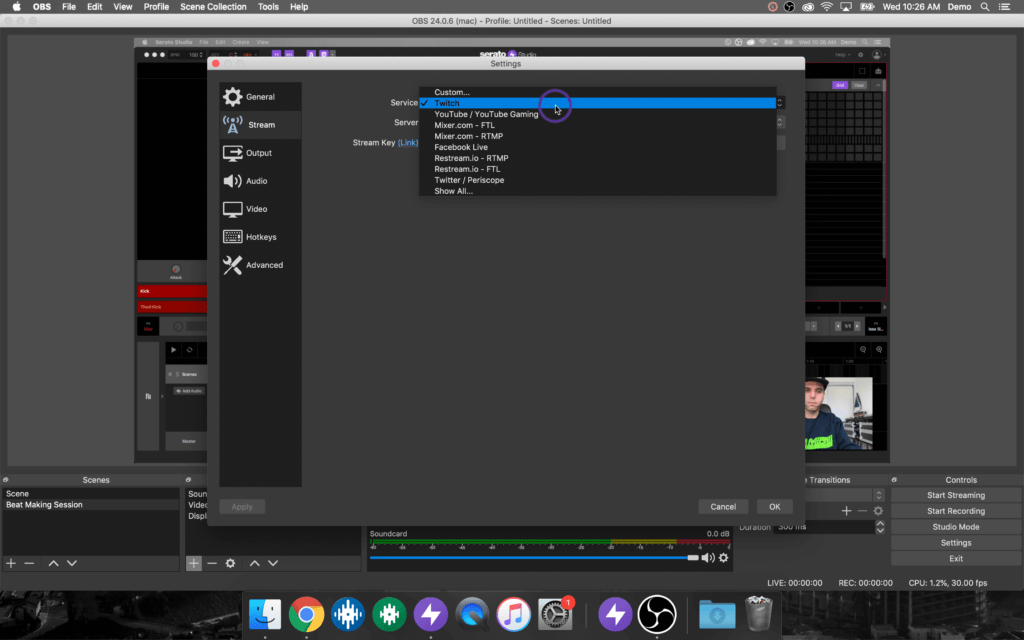
9. Choose your streaming service
In this case, Matt is using Twitch. Under your account info, you’ll need to find your Streaming Key. This also applies to YouTube and Facebook.
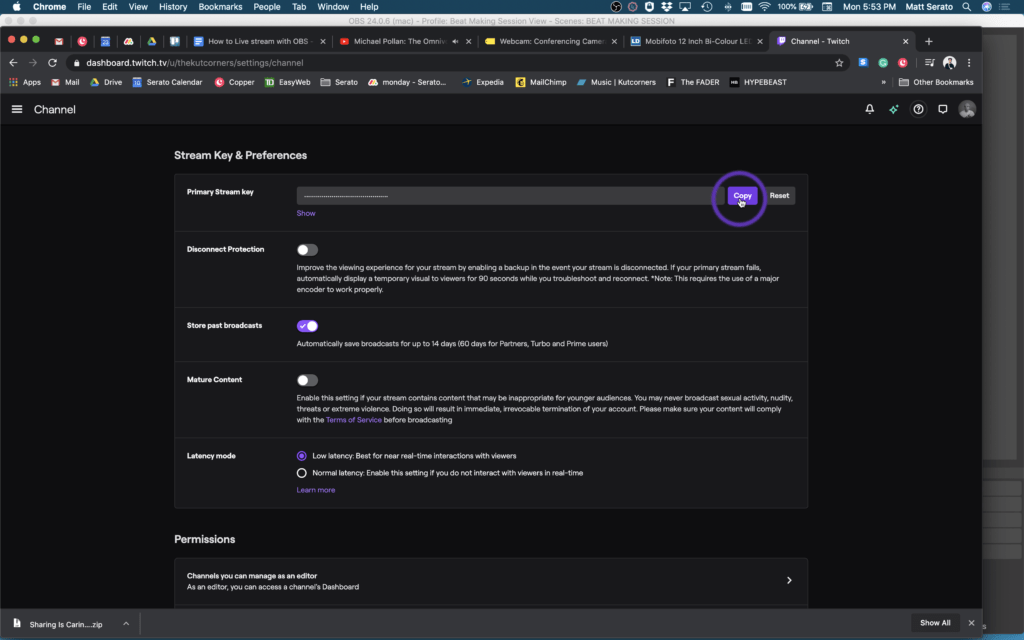
Once you’ve done so, copy it to your clipboard and paste it into OBS under the ‘stream’ tab, which is under ‘settings’.
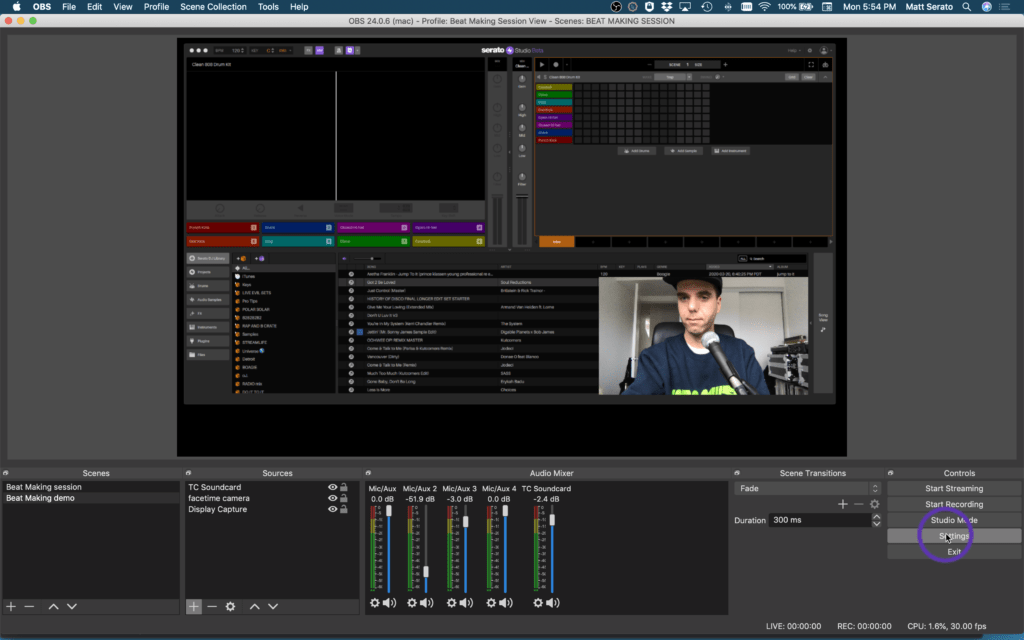
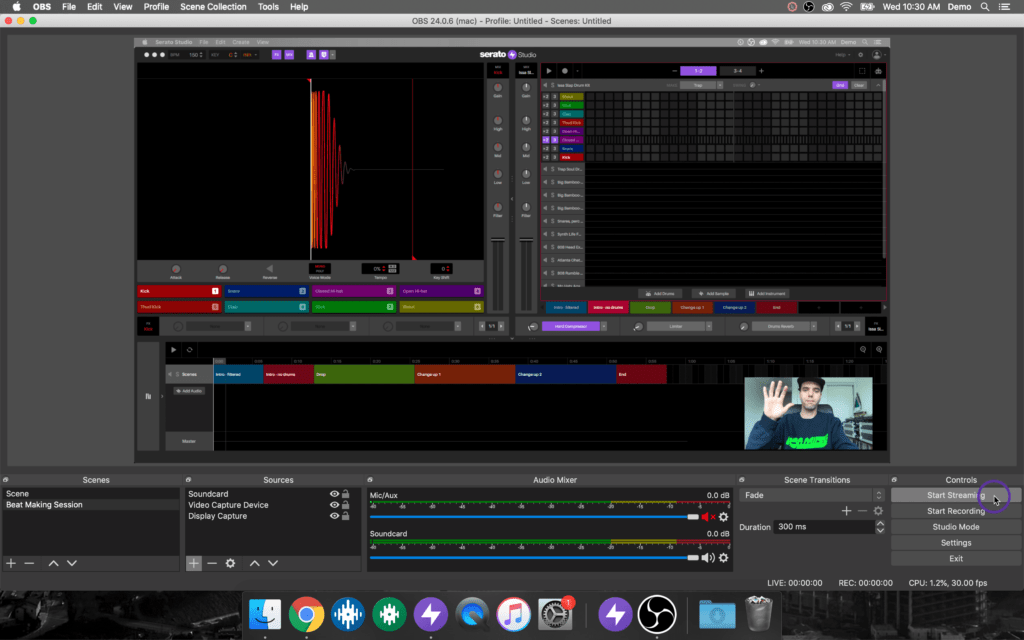
Press ‘Stream’ to go live, and start playing or making your beats...
If you want to be sure everything is working before you broadcast, we suggest making a quick recording using OBS Studio.
We hope you have an enjoyable experience giving streaming a try, and don’t hesitate to hit us at support@serato.com if you have any questions or queries regarding your hardware or software.
We’re all going to get through this. For now, keep the power of music alive and driving you through.
Much love,
Serato.